If you want to know how to install WordPress and start blogging within next 15 minutes or, less, this WordPress Installation Guide is for you.
Why WordPress?
Because WordPress is the best ever blogging platform that is extremely easy to setup and have in-built SEO features that can rank well in SERP.
This is why, most of the new blogs are being (proudly) made with WordPress.
However, many newbie bloggers often either do not use the WordPress Power to its full or, simply use it wrong.
As a result, they fail to achieve the expected results from their blogs.
In this WordPress Installation Guide, I have covered all the basic things that will enable you to start wring your first post on your new blog within next 15 minutes.
But you have to follow everything I have written here in a quick, consistent and step-by-step manner.
There are lots of different ways to Install WordPress on your blog.
However, for the sake of simplicity, we will go with the simplest (and probably quickest, too) method of WordPress Installation.
Here, we will install WordPress using Softaculous Apps Installer.
So let’s get started.
Pre-Requisites to Follow this WordPress Installation Guide:
- Basic Internet Knowledge.
- A Stable (and Good) Internet Connected Computer and
- A Good Domain with a Reliable Web Host like SiteGround
Read: My Complete SiteGround Hosting Service Review 2018 (60% Off Coupon Inside)
Yes.
They are sufficient to start WordPress Installation on your blog.
If you have them all, please proceed to next steps.
Step-1: Login to Your c-Panel:
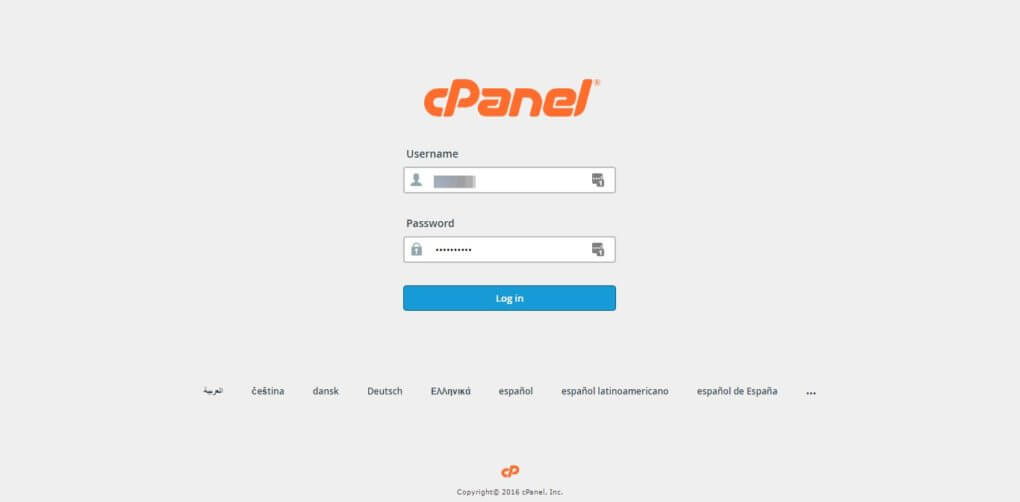
Image Credit: cPanel
Your Web Hosting Service Provider will provide you the cPanel Login Credentials.
If you do not have the your cPanel Login Details handy, please ask your Web Hosting Service provider for the same.
Once you have them, please do login to your cPanel.
Step-2: Opening the Softaculous Apps Installer:
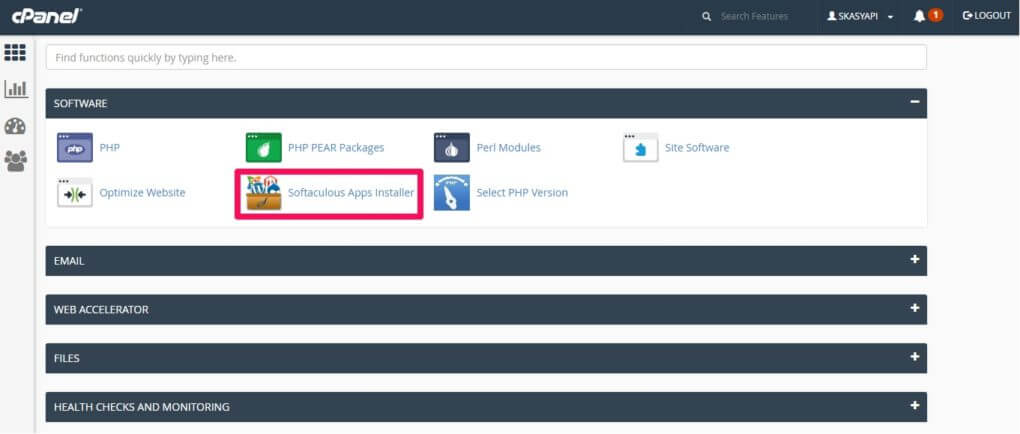
Image Credit: Softaculous
In this step, we have to find and open the Softaculous Apps Installer.
In the latest version of cPanel, it is located under the “Software” Tab.
If, for any reason, you are unable to find it, please contact your Web Hosting Service Provider for help.
Step-3: Installing WordPress for Your Domain:
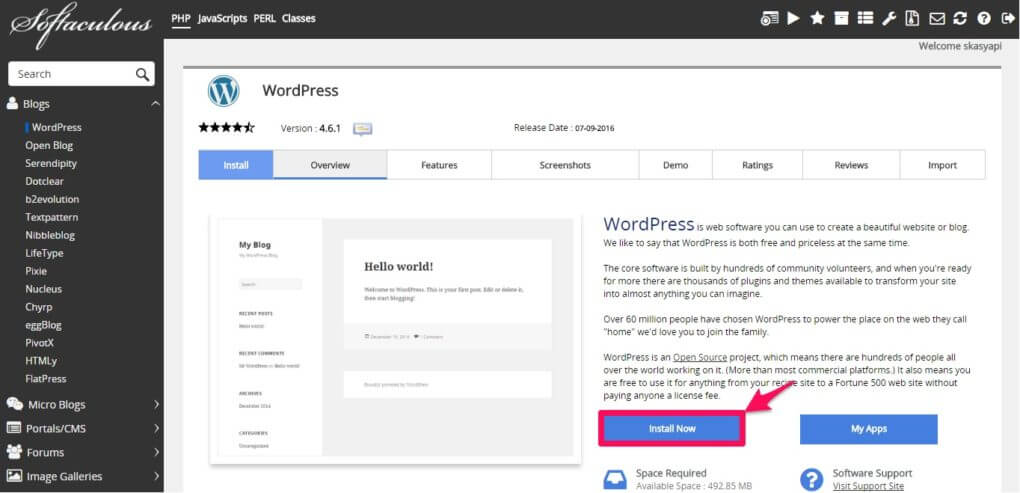
Image Credit: Softaculous
Under Softaculous Apps Installer, you will find lots of general apps to install, divided under different categories.
Here, all you have to find “WordPress” under “Blogs” category.
Once you find “WordPress“, simply click on “Install Now” Button provided under WordPress.
However, this involves a few sub-steps:
#1. Software Setup:
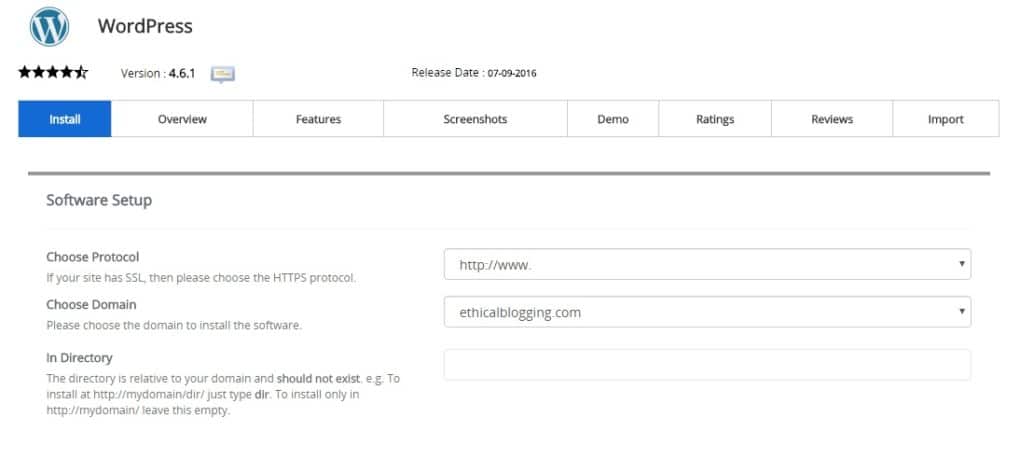
Image Credit: Softaculous
- Choose Protocol: Let WordPress know which protocol (http:// or, http://www. or, https:// or, https://www. ) you want to use with your domain.
For example, if you have purchased SSL Certificate for your domain, you should go with “https://www.” protocol and your Blog URL will become: “https://www.example.com” or something like that.
- Choose Domain: Here, you have to specify the exact domain for which you want to install the WordPress.
Generally, your domain name will be selected by default, if you have only one domain. Otherwise, you have to manually specify your domain using the Drop-Down List given there.
- In Directory: You have to specify the directory in which you want to install WordPress for your domain.
In most cases, you need to delete all default values given there and leave this space absolutely blank.
#2. Site Settings:

Image Credit: Softaculous
- Site Name: Replace the default site name “My Blog” with yours.
For example, my site name is: “Ethical Blogging“
- Site Description: Replace the default site description “My WordPress Blog” with yours.
For example, my site description is: “Gateway of Professional Blogging“
- Enable Multisite (WPMU): Leave the Checkbox Unchecked.
Leave a Quick Comment in the Comment Section below to know more details about this feature.
#3. Admin Account:
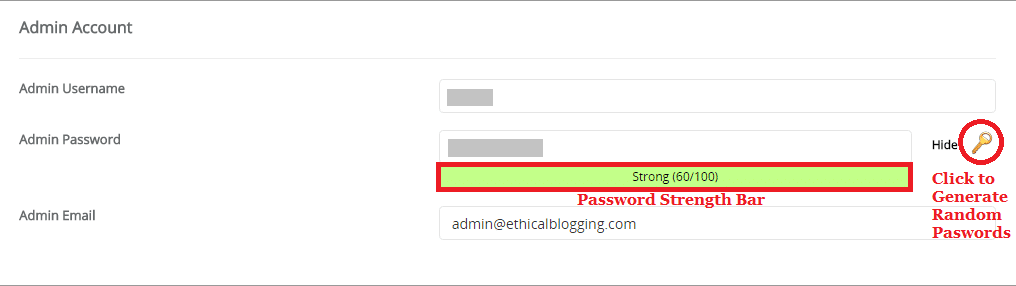
Image Credit: Softaculous
- Admin Username: Replace the default Admin Username “admin” with yours.
- Admin Password: Replace the default Admin Password with yours.
You can also generate random (and stronger) Admin Passwords just by clicking the “Key Icon” given at right side of the “Admin Password Box“ and you can also check the Password Strength using the Password Strength Bar given below the “Admin Password Box”.
- Admin Email: Replace the default Admin Email with yours.
#4. Choose Language:
- Select language: Specify your preferred language using the Drop-Down List given there.
#5. Select Plugins:
Keep this option unaltered.
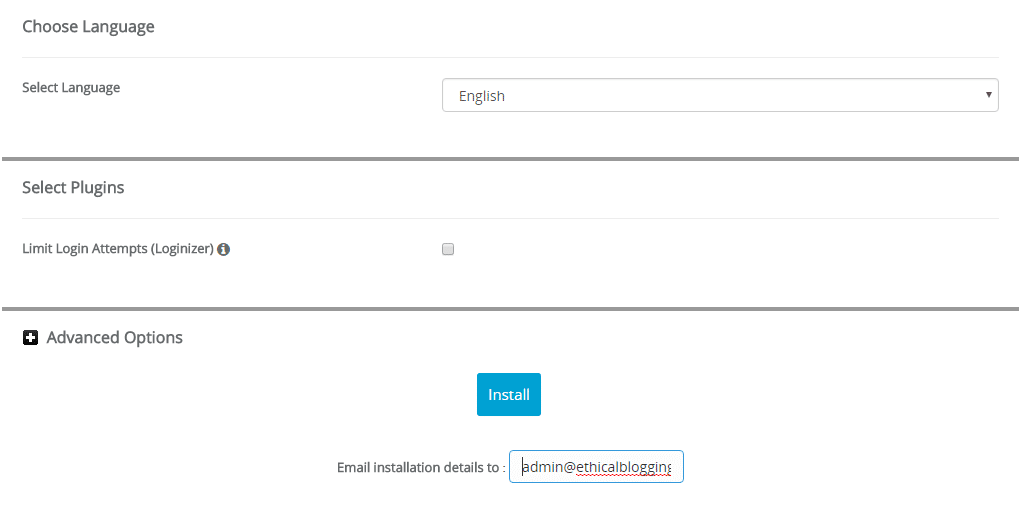
Image Credit: Softaculous
#6. Advanced Options:
Keep this option unaltered.
#7. Email Installation Details To:
Specify where you want to get your WordPress Installation Details via E-Mail.
For example, you may want to receive it at your Admin E-Mail Address.
Once you have completed all the steps mentioned above, simply click on the Blue “Install” Button.
And Softaculous will Install WordPress for your specified domain within a few minutes and you can see the Installation Progress Bar.
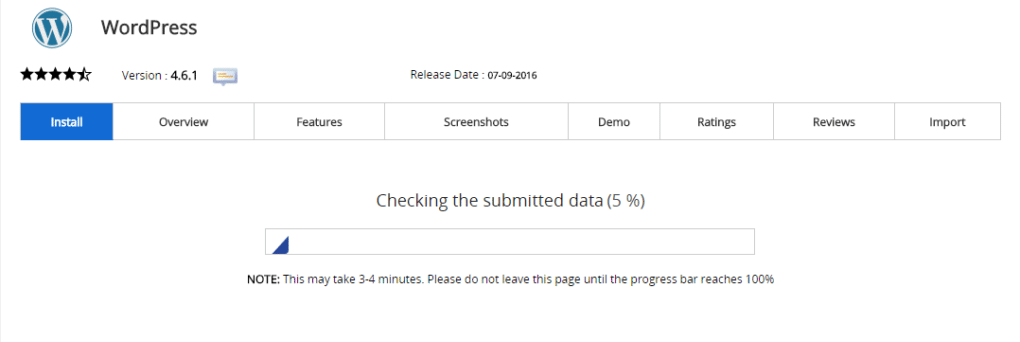
Image Credit: Softaculous
#8. Record Your WordPress Login Details:
Once you have installed WordPress for your desired site, Softaculous will show you the WordPress Account Login Credentials.
It is your time to make a note of the same and keep that note safe.
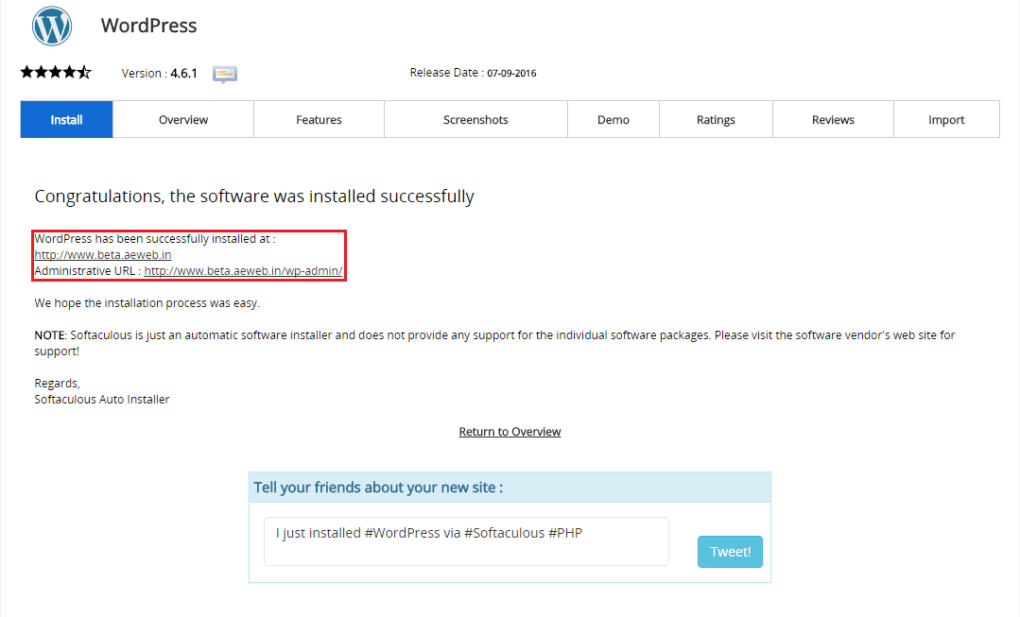
Image Credit: Softaculous
These steps should not take more than 10 minutes to complete if you follow all the steps as directed in this WordPress Installation Guide.
Now let’s move to the next steps.
Step-4: Login to Your WordPress Dashboard:
Finally, the sweet moment comes.
It is your time to login to your whole new WordPress Dashboard.
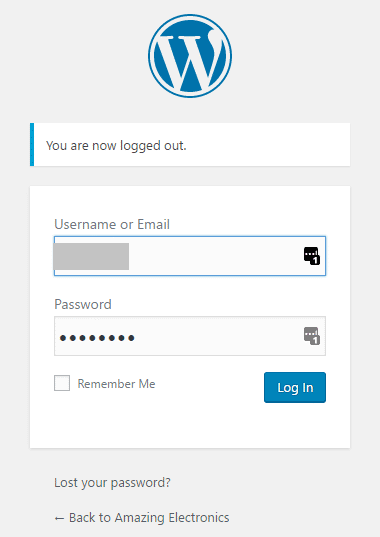
Image Credit: WordPress
Use your WordPress Dashboard Login Credentials (Refer to #8.) and login to your WordPress Dashboard.
Step-5: Write Your First Post:
Once you are into your WordPress Dashboard, it is your time to write your very first post (with lots of excitements).
To do this simply follow the steps given below.
#1. Click on “Posts” from the Left Menu of WordPress Dashboard and a Posts Window will be appeared.
#2. Click on “Add New” there and options to add a new post will be appeared.
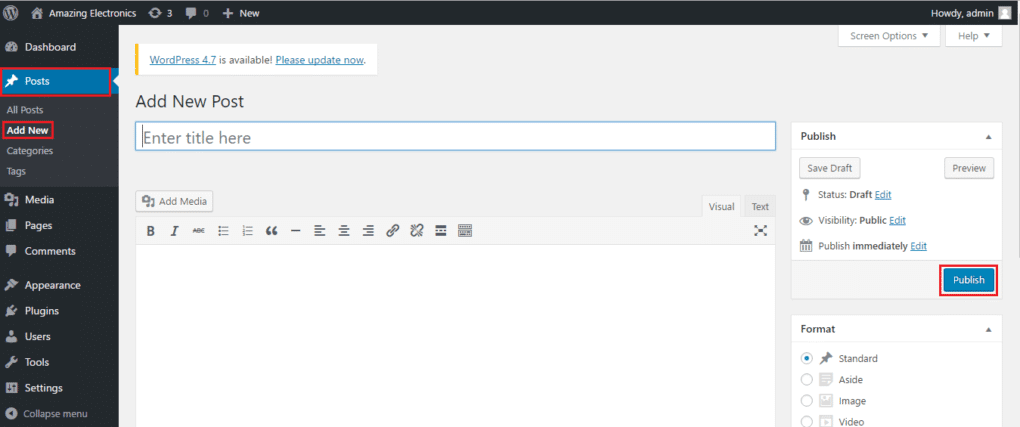
Image Credit: WordPress
#3. Give a suitable “Title” for your First Post.
#4. Start typing your feelings out in the Blank Space provided below the Post Title Bar.
#5. Once you are done, simply hit “Publish” Button located at the Right Side Bar of the New Post Window.
#6. Wait for a few seconds and see your First Post going Live Online.
That’s it.
And if you follow this WordPress Installation Guide carefully, it should not take you more than 5 minutes to complete the technical part.
However, you may need a few minutes extra depending on your length of content, typing speed, internet connection speed, etc.
Ideally, you should be able to finish all the tasks within 15 minutes with the help of this step-by-step WordPress Installation Guide.
Conclusion:
Hope you have enjoyed this guide and taken actions accordingly.
However, in this guide I have just outlined the basics of publishing your First Post using WordPress.
But there are lots of things to be done before starting your full fledged blog that will attract huge traffic and earn revenues for you.
Keep reading this blog for more updated information.
And share this WordPress Installation Guide with all who are in search of good and relevant information on WordPress Installation without spending a dime.
Now let me know if you have faced any issue to follow this WordPress Installation Guide and how many minutes did you spent for installing WordPress to publishing your First Post online by leaving a Quick Comment below.
See you in the next post.
Let’s Blog Ethically.
- WordCamp Kolkata 2019: How and Why You Should Attend It (A Detailed Guide) - February 5, 2019
- 9 Side Hustles that You Should Go Through while Setting Up Your Blog for Success - October 31, 2018
- [Book Review]: Product Launch Success Blueprint by Deepak Kanakaraju (2018) - October 26, 2018
Thank you so much pertaining to giving me personally an update on this subject on your website.
Please be aware that if a brand new post appears
or in case any variations occur to the current write-up,
I would be thinking about reading more and focusing on how to make good
utilization of those tactics you talk about. Thanks for your efforts and consideration of other
men and women by making your blog available.